The Orange Pi Zero is a neat low cost single board computer. When paired with a cheap DVB-T digital television receiver it makes an excellent platform for tracking aircraft broadcasting ADS-B messages in your area using software defined radio (SDR) techniques.
The Orange Pi Zero is an attractive choice for this application because:
- it is very compact, foregoing things like HDMI connectors which are not required for the application.
- it supports wifi as well as wired ethernet.
- it is quite powerful, having an Allwinner H2+ system-on-chip (SoC) featuring a quad core ARM Cortex-A7 processor. Full specs and other useful information is available on the linux-sunxi.org wiki.
- Linux support is very good, thanks to Armbian.
- it is very cheap.
Wifi support is particularly handy, since you can situate the Orange Pi Zero and the USB DVB-T dongle close to a suitable antenna and relay aircraft tracking data back to other computers on your network using wifi. Indeed, with a weatherproof enclosure, everything could be mounted right next to the antenna on a rooftop. This would minimise attenuation of the signals received from planes by keeping the coax cable run between the antenna and the DVB-T dongle as short as possible. Thanks to wifi, the only cabling required to the system would be to deliver power.
But that’s getting a bit ahead of ourselves. Remarkably, even a very simple setup, with everything including the antenna located indoors can track a surprising number of planes.
In this tutorial I will provide step-by-step instructions to get an Orange Pi Zero working with a USB DVB-T dongle to receive tracking information from aircraft.
What you need
As a minimum you’ll need:
- an Orange Pi Zero. There are two models sold by Xunlong with different amounts of RAM installed. I used the 512MB version, but the 256MB version should work as well.
- a micro SD card. I used an 16GB SanDisk Ultra card.
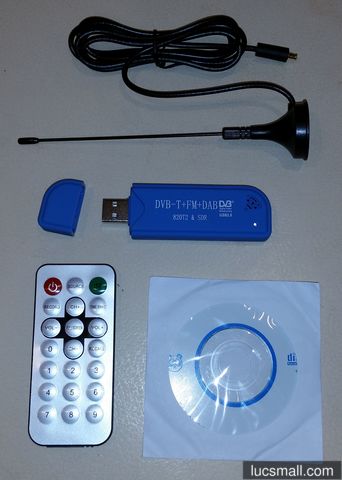
- a USB DVB-T dongle featuring the Realtek RTL2832 chipset. It also needs to be equipped with a compatible tuner chip, the most common of which seems to be the R820T or R820T2 from Rafael Micro. These dongles can be obtained off Aliexpress and ebay for less than US$10. The listing titles now often contain the keywords RTL2832, R820T or R820T2 and SDR. The dongles come with a tiny antenna with a magnetic base, a remote control, and a driver CD. The only parts we’ll be interested in are the dongle itself and the antenna. It’s always a bit of a gamble as to whether the dongle you actually receive will contain the desired RTL2832 and the R820T/R820T2 integrated circuits. Given the low cost, you could always hedge your bets and order a couple of units from different suppliers. Once you receive your dongle, it’s easy enough to prise it apart and read the names of the chips on the PCB.
- a stable 5V power supply rated at 2 amps and a cable with a micro USB plug. Many modern, good quality mobile phone chargers will do just fine.
You will also need a home network (i.e. a router) with a wired or wifi connection; internet access; and a desktop or laptop computer.
Initial setup of your Orange Pi Zero
To keep this blog post shorter, I have written a Beginners guide to the Orange Pi Zero which describes step-by-step how to get Armbian Linux installed on your Orange Pi Zero.
Please follow that tutorial before moving on to the next section.
Making the connections
Making the required connections is pretty straightforward:
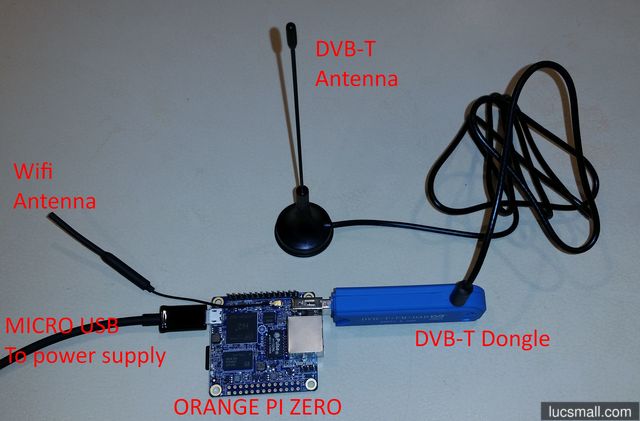
- Connect the DVB-T antenna to the USB DVB-T dongle.
- Connect the USB-DVB-T dongle to the Orange Pi Zero’s USB port.
- If you’re not using wifi, connect an ethernet cable to the Orange Pi Zero.
- Connect your 5V power supply to the Orange Pi Zero via the micro USB connection.
Install RTL SDR
RTL SDR is software which allows you to use your USB DVB-T dongle as a software defined radio, in our case to receive signals from aircraft.
We’ll install RTL SDR following instructions adapted from this gist.
All the following commands should be entered at the prompt after logging into your Orange Pi Zero using PuTTY or another SSH client.
First we will create a file to prevent Linux from loading the standard drivers (aka modules) for the DVB-T dongle:
cat <<EOF > ~/no-rtl.conf
blacklist dvb_usb_rtl2832u
blacklist rtl2832
blacklist rtl2830
EOF
Next we’ll move that newly created file into the required directory:
sudo mv ~/no-rtl.conf /etc/modprobe.d/
Then we’ll install some dependencies for building RTL SDR:
sudo apt-get install -y cmake libusb-1.0-0-dev build-essential
Now we’ll clone RTL SDR into a new directory called sdr below our home directory:
mkdir ~/sdr
cd ~/sdr
git clone git://git.osmocom.org/rtl-sdr.git
cd ~/sdr/rtl-sdr
And we’ll build RTL SDR:
mkdir build
cd build
cmake ../ -DINSTALL_UDEV_RULES=ON
And install it:
sudo make install
sudo ldconfig
sudo cp ~/sdr/rtl-sdr/rtl-sdr.rules /etc/udev/rules.d/
Now we need to reboot our Orange Pi Zero by typing:
sudo reboot
Your connection to the Orange Pi Zero will be dropped and you’ll need to reconnect after waiting a minute or two for the Orange Pi Zero to reboot.
Test RTL SDR works
To test RTL SDR is working correctly:
Ensure the DVB-T dongle is plugged into the Orange Pi Zero’s USB port.
Run the command:
rtl_testHit Control + C to quit rtl_test.
Compile dump1090
Next we’ll download and compile dump1090, a neat piece of software for tracking aircraft using RTL SDR.
dump1090 requires pkg-config, so we’ll install it first:
sudo apt-get install -y pkg-config
We can now clone the dump1090 source code and compile it:
cd ~/sdr
git clone https://github.com/antirez/dump1090.git
cd ~/sdr/dump1090
make
Running dump1090
You can start dump1090 by changing to the installation directory and executing it as follows:
cd ~/sdr/dump1090
./dump1090  --interactive --aggressive --net
Within a few seconds you should start to see the details of aircraft tracked:
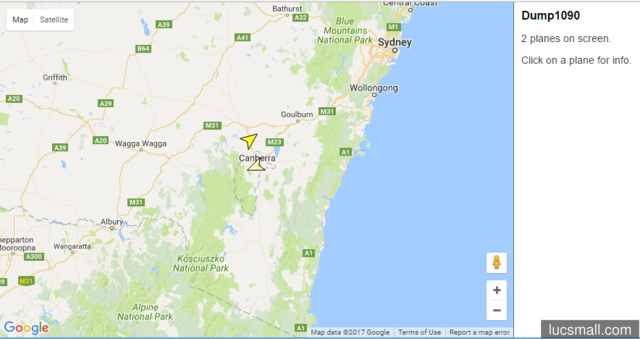
And if you open a web browser to http://your Orange Pi Zero’s IP address:8080 you should see a map representation of the same data:
Should you wish to quit dump1090 simply hit Control + C at the console.
If you’re not seeing any aircraft data, try moving the antenna to a location with a better view of the sky, for instance near a window.
Getting dump1090 to run within a screen session at boot
Wouldn’t it be nice if we could get the Orange Pi Zero to start dump1090 at boot, so we need only to power it up to start tracking planes?
The way I like to set this up is using GNU screen, so let’s install it first:
sudo apt-get install screen
Now let’s change to the dump1090 installation directory:
cd ~/sdr/dump1090/
Create a text file called run.sh using your favourite editor (vim, nano, etc.) with the following contents:
#!/bin/bash
cd "${HOME}/sdr/dump1090/"
./dump1090 --net --interactive --aggressive
Save the file and quit the text editor.
Now set permissions to allow the file to be executed:
chmod u+x ~/sdr/dump1090/run.sh
Next edit your crontab file:
crontab -e
to include the following line:
@reboot screen -d -m -S "dump1090 at boot" ${HOME}/sdr/dump1090/run.sh
Reboot the Orange Pi Zero by typing:
sudo reboot
Your connection to the Orange Pi Zero will be dropped and you’ll need to reconnect after waiting a minute or two for the Orange Pi Zero to reboot. As part of the start up process, dump1090 should start automatically.
Once you’ve reconnected to your Orange Pi Zero, you can “attach” to the dump1090 session by typing:
screen -R
You will see the same listing of tracked aircraft as before.
To “detach” from dump1090 without quitting it, hit Control-A followed by d. You can “re-attach” at any future point with screen -R as above.
Refinements
Now you have a working aircraft tracking system based on the Orange Pi Zero and a USB DVB-T dongle, you can start to refine your set up. Here are a couple of quick tweaks that really improve things.
Cool your Dongle
The USB DVB-T dongles run really hot. In my experience the hotter they are, the less sensitive they are when it comes to picking up distant signals from planes. I’m not the only one to have witnessed this phenomenon.
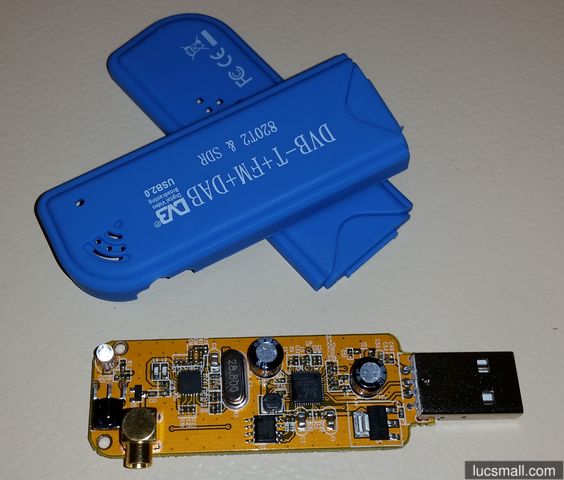
One of the easist things you can do to address this is to prise apart the plastic case:
Using the dongle without a case greatly helps with airflow to cool it.
Tune your antenna
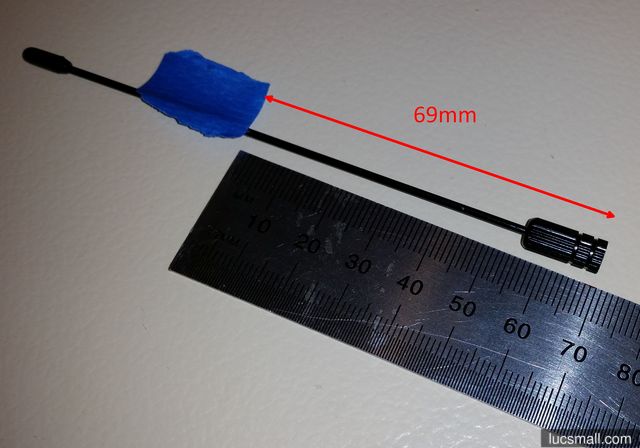
The next refinement is to more closely “tune” your antenna to match the wavelength of the 1090MHz signals from aircraft. One quarter wavelength at 1090MHz is approximately 69mm, so if we trim the antenna to that length, reception should be improved.
First unscrew the antenna from its base and mark 69mm from the end:
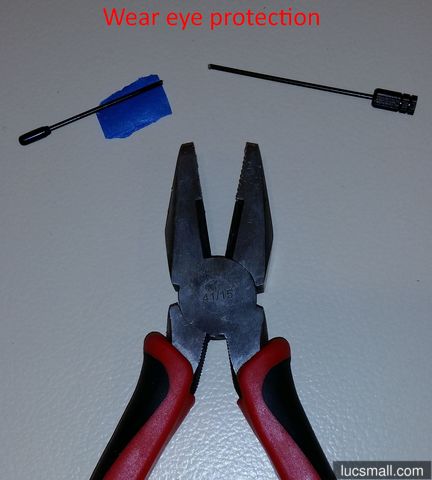
Then cut the antenna at the point you marked. A stout pair of pliers will work. But use eye protection and take care since bits can go flying:
Here’s a comparison of the “tuned” antenna to the stock antenna:
Screw the antenna back into its base. With any luck you should experience better reception.
Position your antenna better
Range will be greatly improved if you position your antenna outside (if possible) and as high as possible.
Enjoy your new aircraft tracking hobby!
