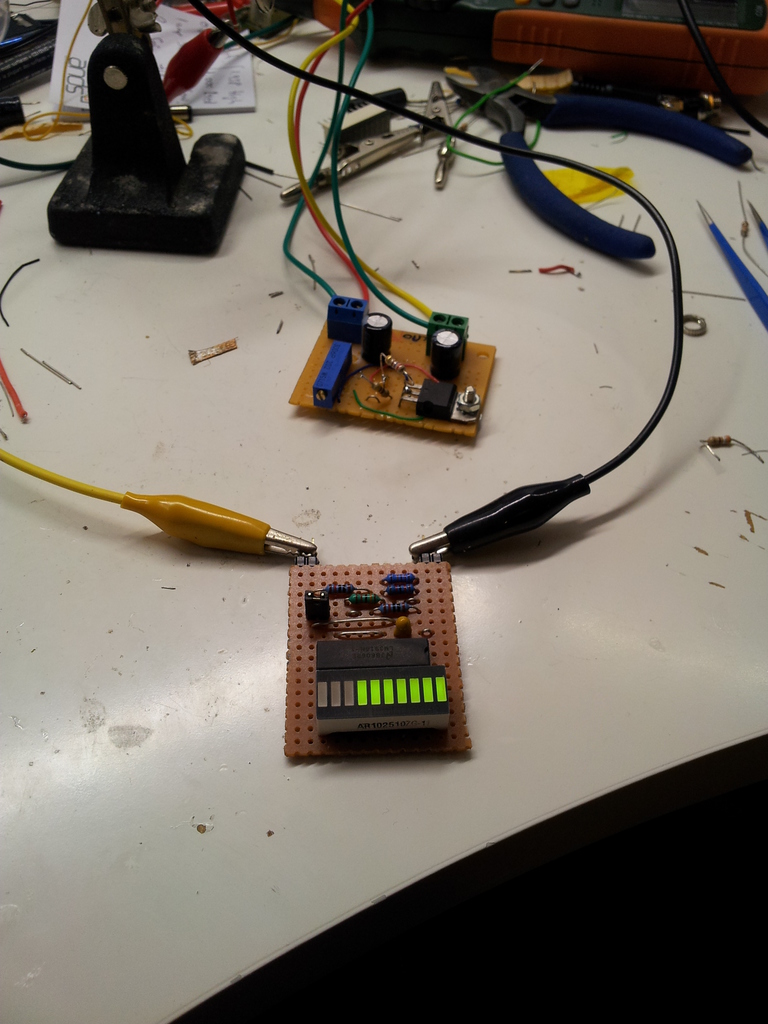
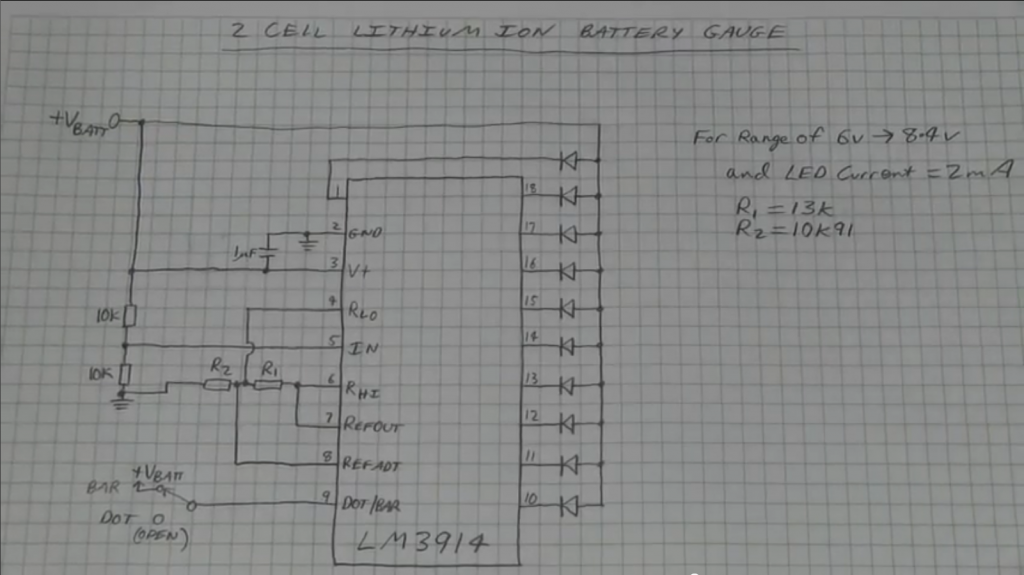
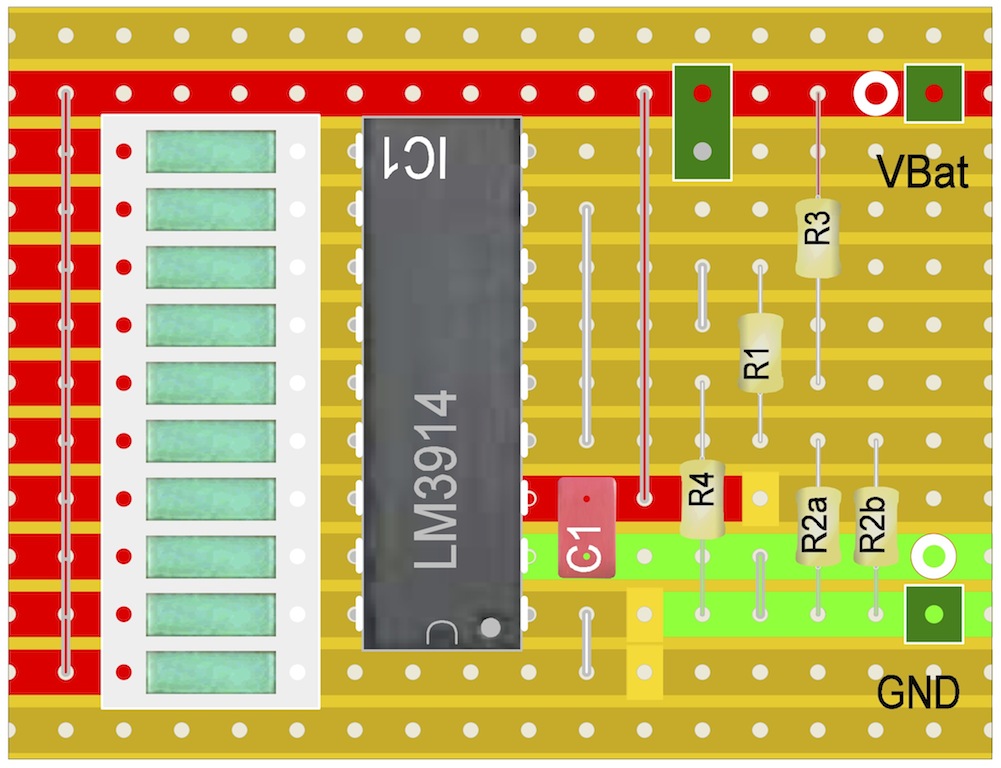
This is my build of the lithium ion/polymer battery checker designed by Dave Jones and featured on an EEVBlog episode. Helpfully, a forum participant took a screen grab of the schematic. I’ve shared my stripboard (veroboard, perfboard, protoboard, etc.) layout in case you want to build one for yourself. You can download a PDF version of the layout that will print to scale.
Lately I’ve been building custom lights for my bike and wanted something to measure the state of the lithium polymer batteries that are powering the high brightness LEDs. While battery voltage is a poor measure of the state of charge, since it’s pretty constant for most of the discharge cycle before dropping off rapidly, it is nevertheless useful for telling if the battery is dead or near dead. Before I develop an active system for preventing overdischarge, Dave’s elegant LM3914-based circuit will provide a criticial indication that it’s time to change batteries.
Parts
- Small piece of stripboard
- 10 segment LED bargraph display
- LM3914
- R1 = 13k
- R2a = 12k, R2b = 120k
- R3, R4 = 10k
- C1 = 1uF
- Pin header and jumper for dot/bar display selection
(All resistors 1% types).
The Prototype
I constructed a prototype on a solderless breadboard. As can be seen, I didn’t have the correct value 1% resistors, so I built-up the required values using quite a few resistors.
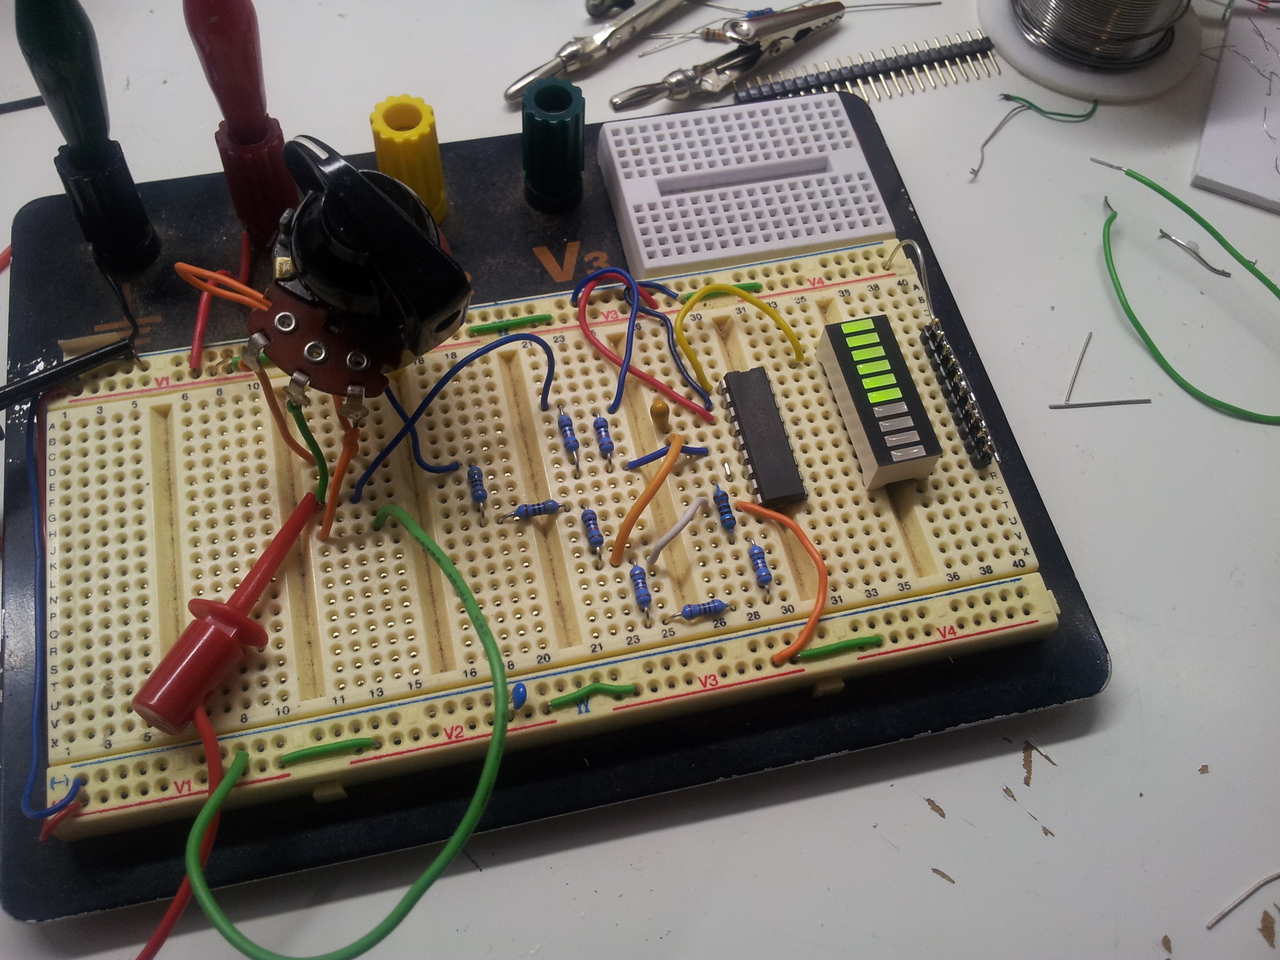
I used a 5k pot connected across the rails as a variable voltage divider to test the threshold voltage for each of the ten LEDs. Here are the values I measured:
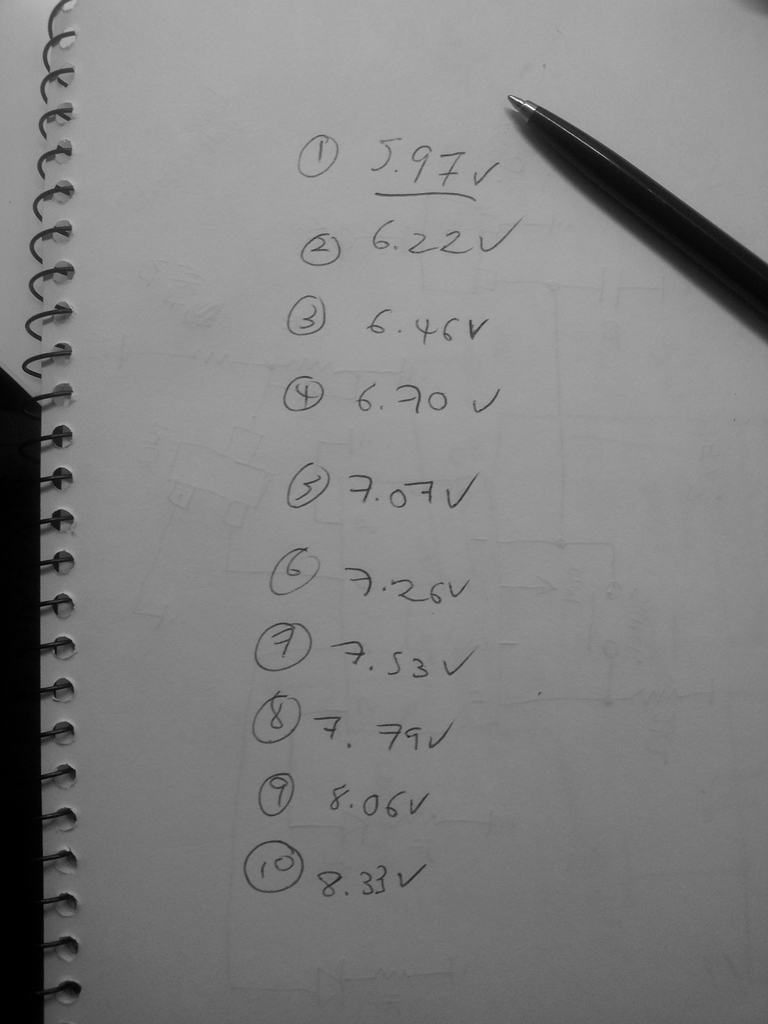
Pretty much as expected… All ten LEDs will light if the voltage exceeds about 8.3 volts. A fully charged 2S lipoly pack will reach 8.4 volts, so this is perfect. At the lower end, the last LED will extinguish when the battery voltage drops below about 6 volts. You really don’t want to discharge a lipoly pack lower than that.
The Build
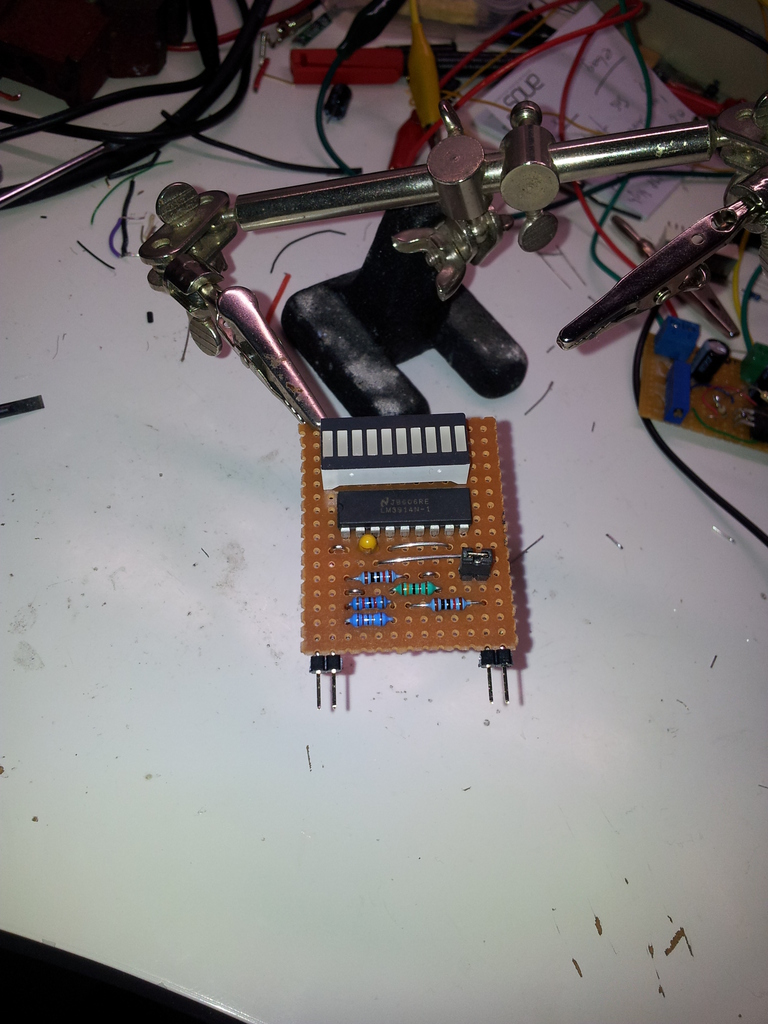
I like to layout my stripboard designs in software before construction - you can optimise for the smallest board area, avoid unforeseen short circuits, and construction becomes a breeze. Your build is also documented for future troubleshooting or for when you want to build another.

Here are the measured threshold voltages for the stripboard version. They vary a little from those above, probably because different resistors were used throughout (the LM3914 was the same unit).