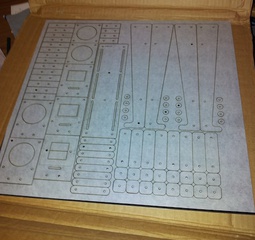
Update 21 November 2012: My Ponoko order arrived yesterday. It is proof that the technique works - all lines were cut perfectly, the engraving looks great, and the text is raster engraved beautifully. See below for the ocular proof.
I really like Ponoko’s laser-cutting service. It’s a breeze to use and the customer support is excellent. With it, I can now create custom enclosures for my electronics projects, bringing a new level of professionalism to their finish.
The only bit I find hard is capturing my designs in the vector graphics tool Inkscape. This is clearly an immensely powerful program with a plethora of features. Mastering such programs seems to involve setting oneself up for success, becoming intimately familiar with what each tool does, picking up lots of tricks, and memorising all the shortcut keys. It’s a significant time investment and a steep learning curve; and because I only design enclosures every now and then, it takes a while to reacquaint myself with all these things.
A lot of my designs involve repeating elements - equally spaced mounting holes, for instance. This repetition led me to ask whether I could specify my designs programmatically. I’m comfortable with programming, and certainly more adept at it than I am at using a vector graphics tool!
Specifying a design in code seemed to bring with it a number of advantages:
Point perfect positioning. Ability to specify precise coordinates and no risk of “bumping” shapes out of their intended place.
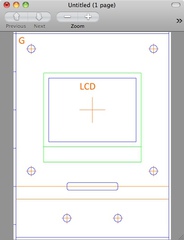
Built in workflow. Possible to set a flag and change from “design” mode, with guidelines and annotations shown and thick lines for printing, to “production” mode, with only the details to be cut/engraved shown and thin lines for the laser cutter.
Versioning. Standard source control tools, like Git and SVN can be used.
Public transport friendly! It’s quite feasible to type on a bus or train; much harder to use a mouse to create precise graphics.
I’m not saying that these things can’t be achieved with a vector graphics program; rather that I could achieve these desirable things by specifying my laser-cutting design as a program.
For about a second, I thought I should approach this by learning Postscript. Then I discovered that Processing has the ability to export vector graphics as PDF. Inkscape, meanwhile, has the ability to import PDFs. So I came up with the following workflow:
Create design in Processing. Use a very basic “template” sketch to set up PDF mode, set the scale for millimetres (mm), and set colours for Ponoko cut lines, engraving, etc. Program the design into the template. Run the sketch and preview the design in a PDF viewer (Mac Preview is a good choice). I’ve made this template available on GitHub for you to clone and modify.
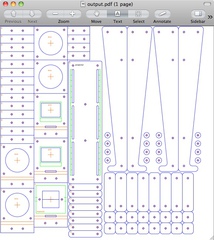
Regenerate the design for production. This hides any guidelines and annotations. It also makes all the lines thin (0.01mm) to suit the laser cutter. This also sets the background to grey for reasons I’ll come to next.
Drop the PDF onto a Ponoko template in Inkscape. Import the PDF and position on the Ponoko SVG template for the desired material size (e.g. P1, P2, P3). Locate the object containing the grey background and set the Fill to transparent. (The background was intentionally made grey so it would be easy to locate and change. Having any kind of background in place (e.g. white) seemed to lead to very high production cost estimates when the design was uploaded to Ponoko. Setting the Fill to transparent fixed this.)
Ship it. Upload the SVG to Ponoko for production.
After a bit of experimentation, I found this technique to work really well. It was actually quite quick to create even relatively complex shapes in code.
Update 21 November 2012: And here’s the proof that the technique works:


