I document my self-contained Raspberry Pi camera rig for timelapse photography. It’s powered off a USB mobile phone booster pack. To suit my chosen form factor, I had to bust out the soldering iron and solder connections directly to the Raspberry Pi Model A+’s bed of nails test pins (“PPxx”). The rig includes a wifi dongle and a power off button for clean shutdowns without a keyboard and screen.
Wifi Nixie Display With Espduino MQTT
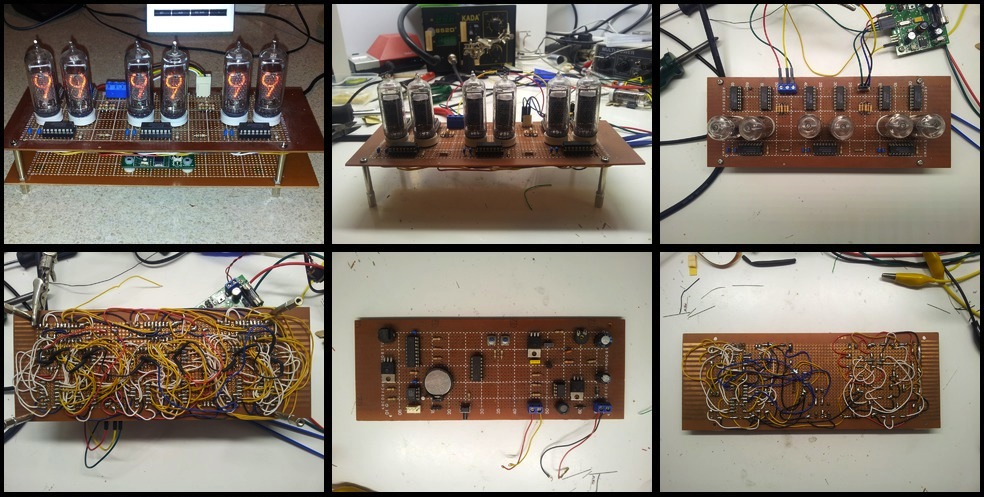
I talk about the design and coding of a wireless nixie tube display using an Arduino, an ESP8266 ESP-01 module, some HV power supplies, and B7971 tubes.
The display shows anything that has been published to a special MQTT topic.
The code uses the github user tuanpmt’s espduino MQTT library for Arduino.
Upgrading the Firmware on the ESP8266 to Espduino for Arduino Based MQTT
I upload the firmware from github user tuanpmt’s espduino project to my ESP8266 ESP-01 wifi breakout board. This involves grounding GPIO0 and using a python script (provided) to upload the firmware image.
When used in combination with an Arduino, it allows the Arduino to function as a wireless MQTT client, unlocking all sorts of IoT potential.
My Homebrew Breakout Board for the ESP8266 ESP-01 Module
I talk through the design and testing of a simple homebrew PCB to breakout the connections of an Espressif ESP8266 ESP-01 wifi module to interface with a USB-serial converter (as used for the Arduino). I use an IPython notebook to issue “AT” commands to the device and observe the output.
Avoiding Redundant Notifications With Gmail and IFTTT
For a while now I’ve been using ifttt and Pushover to cut down the number of notifications I receive on my phone. Email was the worst. I’d receive emails from friends and family interspersed with promotional emails. I wanted to be notified of the stuff from family and friends immediately. While I do like to read the promotional stuff (mostly about electronics parts and kits), it could wait.
I use gmail and already make extensive use of its filters to assign labels like “Friends” and “Family” to incoming email. Ifttt allows one to craft a recipe to send a Pushover notification when gmail receives a new email matching a label. It’s really easy to do and works very reliably. Once these recipes were created and tested, I disabled standard gmail notifications on my phone.
The number of interruptions was dramatically cut down, saving me from a whole lot of unnecessary distraction.

But there was one snag.
Weather Updates
This is a quick update on my activities hacking the WH2 outdoor temperature and humidity sensor from Fine Offset Electronics. If you’d like to catch up on the earlier posts, here they are: part 1, part 2, part 3.
Read on to find out about an improved Arduino sketch, a Nixie thermometer project, superhets vs super-regens, and adapting the code to work with the Digitech XC0346 weather station…

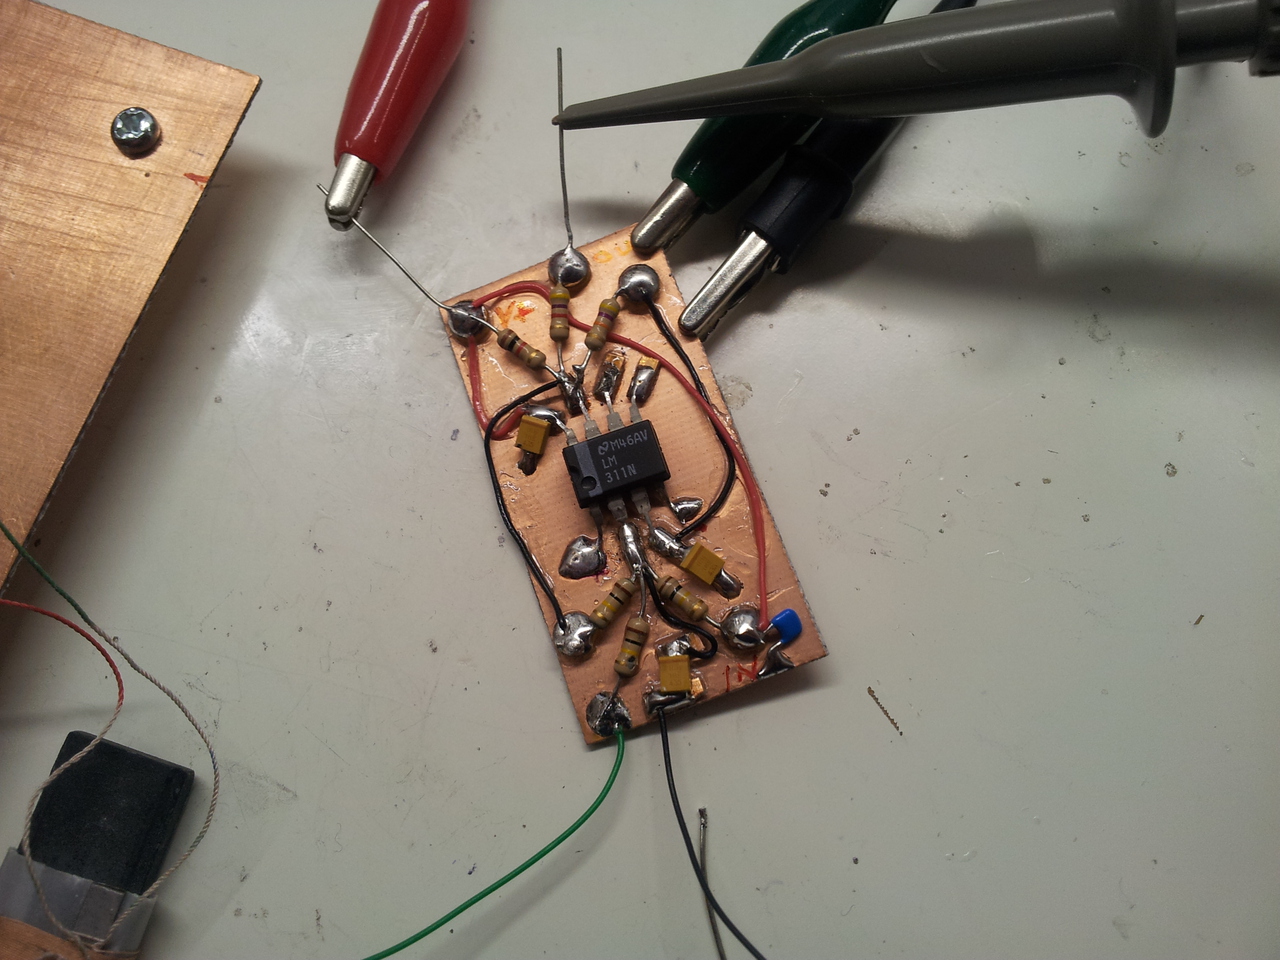
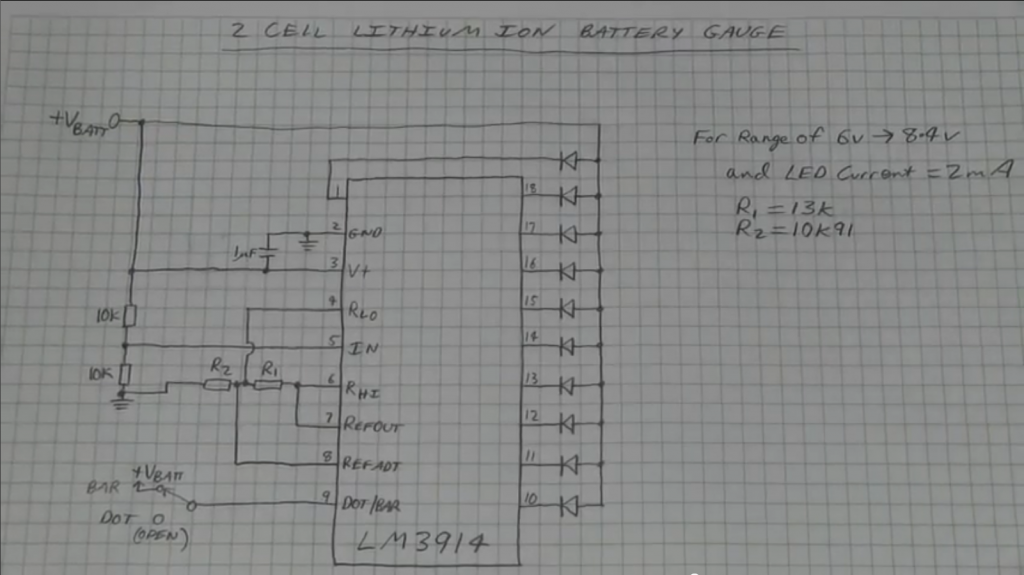
EEVBlog Lipoly Battery Checker Build
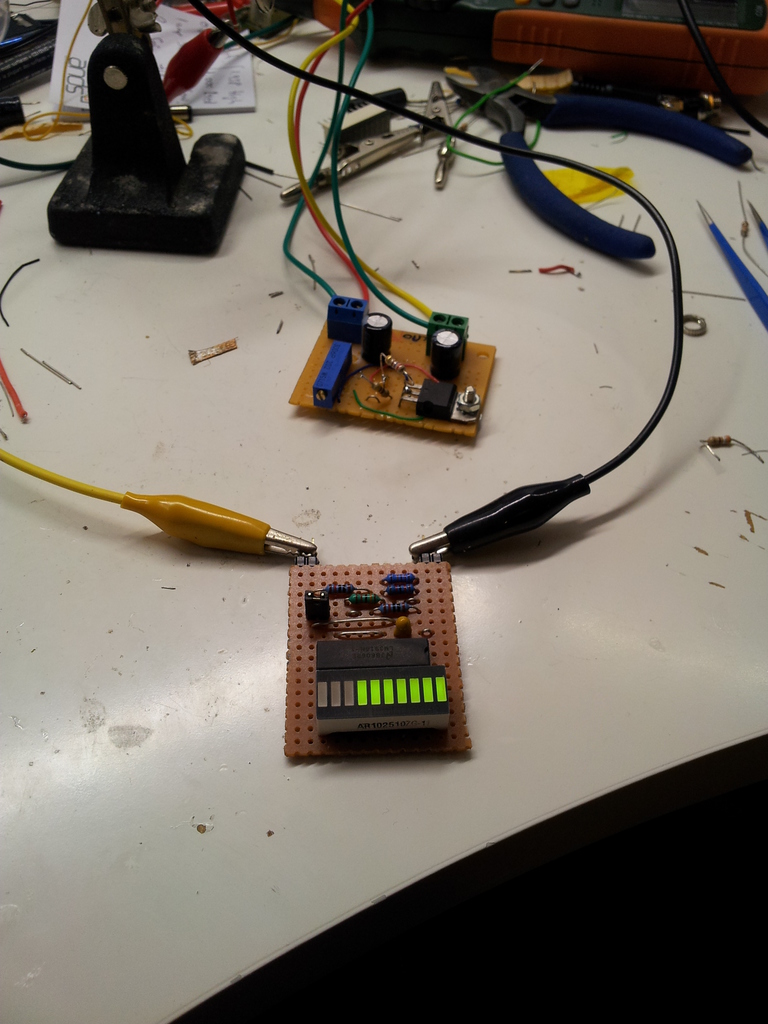
This is my build of the lithium ion/polymer battery checker designed by Dave Jones and featured on an EEVBlog episode. Helpfully, a forum participant took a screen grab of the schematic. I’ve shared my stripboard (veroboard, perfboard, protoboard, etc.) layout in case you want to build one for yourself. You can download a PDF version of the layout that will print to scale.
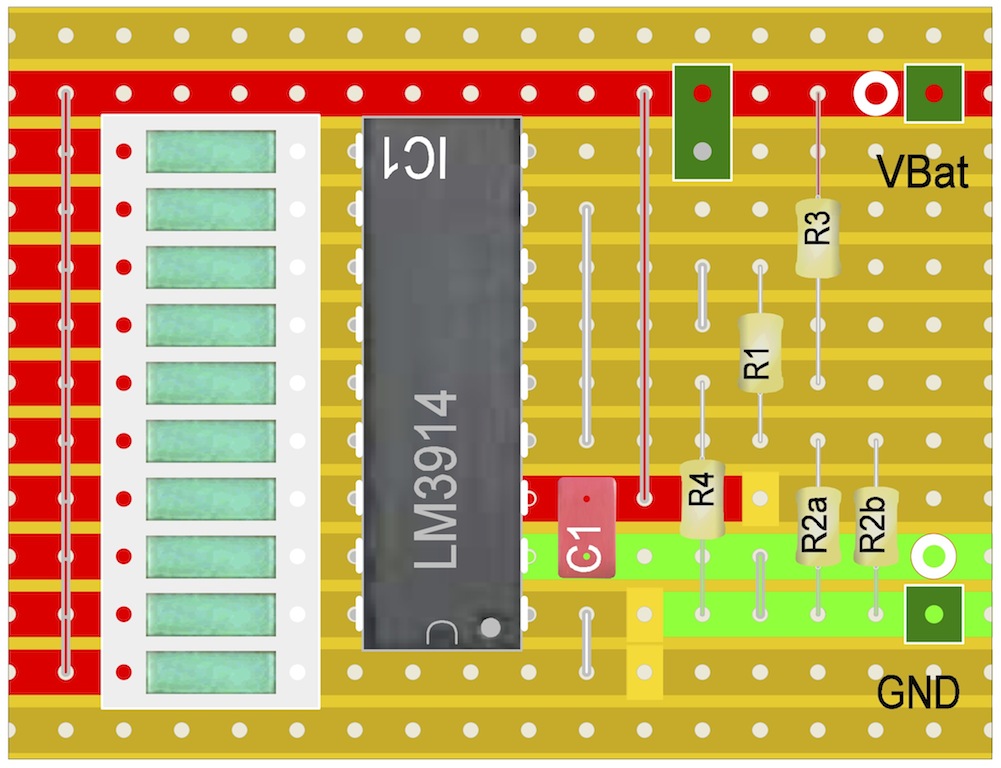
Lately I’ve been building custom lights for my bike and wanted something to measure the state of the lithium polymer batteries that are powering the high brightness LEDs. While battery voltage is a poor measure of the state of charge, since it’s pretty constant for most of the discharge cycle before dropping off rapidly, it is nevertheless useful for telling if the battery is dead or near dead. Before I develop an active system for preventing overdischarge, Dave’s elegant LM3914-based circuit will provide a criticial indication that it’s time to change batteries.
Revisiting My First Nixie Clock
This is a bit of a retrospective on things I’ve learned since I built my first nixie clock back in 2007. Its been suffering from what looked like cathode poisoning for a while, so I discontinued its use and decided to upgrade it.
First let’s look at the specs. It’s built using point-to-point wiring on two stacked boards. The top board consists of 6 Russian IN-14 nixie tubes. These are driven by 6 Russian KM155ID1 equivalents to the 74141 nixie decoder/driver, driven in turn by 3 74HC595 latching shift registers. The top board also includes six LEDs that provide blue uplighting of the nixie tubes.
The lower board contains a 5V linear regulator (a 7805), a high voltage power supply built around an NE555, a Picaxe 18X MCU, a DS1307 real time clock, some switches and a MOSFET to drive the LEDs with a PWM signal.
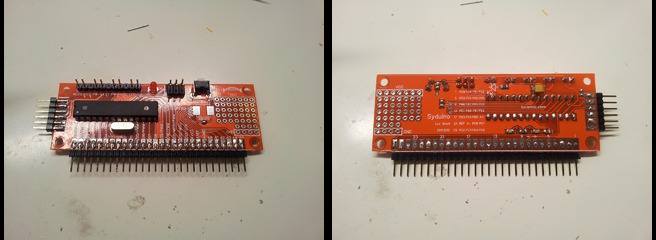
The Syduino
This is the Syduino - my take on a breadboard friendly barebones Arduino clone. It was the last PCB I designed while we were still living in Sydney, so the name seemed apt. It was manufactured on 0.8mm FR4 material as part of a larger board hosting multiple designs. By using thinner PCB material it was possible to score the board with a knife and snap it, separating the Syduino from the other designs.
Wideband Oscillator for Testing Resonant Circuits
This is a wideband oscillator for testing resonant LC circuits that is probably good to 5MHz. It’s actually nothing more than the front end for this PIC based inductance and capacitance meter circuit. (I have built an LC meter along these lines and it has proved to be an extremely handy piece of kit.)